
The short answer
Start at the charging station, not with a factory reset. Note the light’s colour and whether it flashes, then choose the matching path below. The same mower error can have different causes.
Applies toPhysical boundary-wire Automower installations. Excludes EPOS and other wire-free navigation faults. LED meanings must match the manual for your model.
This is a first-check guide, not a circuit-board repair procedure. Keep the exact model name and error message beside you. After each check, note what changed before moving to another part of the installation.
01Flashing blue: inspect the easy-to-reach connections
A flashing blue light points to an incomplete loop signal. Begin at the station: inspect the boundary-wire connectors and any guide-wire connections required by your model. Look for a connector that has come loose or suffered damage.
Then inspect known wire joints. Use the installation map rather than pulling up the entire boundary. Recently disturbed edging, planting areas, and old repairs are sensible places to record and inspect.
Three places to look before lifting the lawn
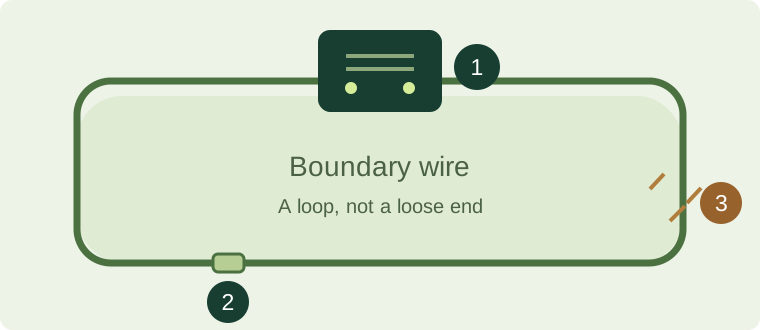
- 1Station connections
- 2Existing wire joints
- 3Recently disturbed edges
The check
With power isolated as directed, inspect and correctly reseat accessible connectors. Restore power only after the connections are secure.
What did you find?
The light returns to its normal operating state
Next stepTry the normal start procedure. If the fault returns, record whether it happens at the same location or after touching a connection.
The light still flashes blue
Next stepContinue to the wire-search step below. A visual check alone cannot establish that the entire buried wire is intact.
02Still blue: narrow the search before cutting
Husqvarna describes a manual isolation method and a wire-break detector method. A detector can help locate a clean break, but may be less effective for partial damage. Follow the linked procedure for your installation; guide-wire connections and ECO settings matter.
Do not make random cuts to “see what happens”. The manufacturer’s isolation method deliberately tests smaller portions of the loop. If that procedure is unfamiliar, an installer can carry out the test and repair.
What did you find?
A damaged section is found
Next stepUse the specified outdoor wire and compatible repair coupler, following the manufacturer’s repair instructions. Repeat the normal operating check.
No break is identified
Next stepStop replacing parts by guesswork. Ask a dealer to assess the loop and station, and share your observations.
Based on source 2.
03No light: follow the power path
A dark station can be caused by an unpowered outlet, an incorrectly connected low-voltage cable, a damaged cable, or a station fault. Check the accessible supply connections and look along the cable for visible damage.
Only check an outlet with a known-working appliance if it is dry, intact, and safe to use. Do not open mains equipment. Different models use different low-voltage cables: a cable that appears similar is not proof of compatibility.
The check
Confirm the supply is available, then isolate power before inspecting or reseating low-voltage connections.
What did you find?
The light comes back on
Next stepRead the new light pattern and follow that path. Restoring power and restoring the loop signal are separate checks.
The light stays off, or a cable is damaged
Next stepContact a dealer. Stop using damaged equipment. Mention a recent thunderstorm if the failure followed one.
Based on source 3.
04Flashing green: check ECO mode
On supported wired models, ECO mode switches off the loop and station signals while the mower is parked. Charging can continue. A scheduled start switches the signals on again.
If you carried the mower out to start it manually, reactivate the signal using the procedure for its controls. Husqvarna’s instructions include returning it to the station, pressing STOP, waiting five seconds, and checking for a steady green light after removal. Follow the linked keypad or jogwheel instructions in full.
What did you find?
It was simply waiting for its scheduled start
Next stepNo wire repair is indicated by this observation alone. Let the schedule operate normally.
The model or behaviour does not match
Next stepConsult its manual. Aspire R6V, 308V and 312V do not support ECO mode and are outside this wired-installation guide.
05A steady light or another colour needs a different check
Steady blue is not the same state as flashing blue. Steady green with an error can involve signal detection, installation layout, or interference. Yellow and red also have their own checks. Use the manufacturer’s matching LED guidance rather than applying the blue-flashing procedure to every fault.
What did you find?
The error appears only in one part of the lawn
Next stepMark the location on your map and tell the installer. This is more useful evidence than a general report that the mower sometimes stops.
The error began after servicing
Next stepTell the servicing dealer what changed and ask whether the installation needs a new loop signal.
Based on source 1.
06Make the next support conversation useful
If the same fault persists, prepare a short record instead of another round of resets. The checklist below is a YardOnAuto troubleshooting note to help you describe the problem; it is not a diagnosis.
- Exact mower model and error text.
- Station LED colour and whether it flashes.
- Recent work, storm, service, or cable change.
- Connections inspected and the result after each check.
- Where in the lawn the problem occurs.
07Worked case: the same error, two different investigations
Illustrative scenario, not a product test: a wired mower stopped after a new flower bed was edged. Its owner records a flashing blue station light and marks the worked area on a sketch. The useful next observation is whether an accessible connector or a known joint was disturbed. The timing makes that area worth inspecting; it does not prove that the spade cut the wire.
Now change one fact: the light flashes green and the mower was carried away from its station before a manual start. The error text has not changed, but the ECO-mode path becomes relevant. Looking for a buried break before checking that state could create unnecessary repairs. Record the light pattern before resetting anything.
Keep an observation separate from an explanation. “Blue flashing at 09:10, unchanged after reseating the accessible connector with power isolated” is useful evidence. “Bad circuit board” is a conclusion that this check has not established. If a dealer takes over, hand over the first record and the installation sketch; do not erase the useful sequence by trying several changes together.
Take a useful record away
Your mower check sheet
Use these prompts on paper or print this guide. Keep unknown items marked as pending; a completed record is not a diagnosis.
- Mower model; exact error; date and time
- Station LED: colour; steady or flashing
- Last successful run and recent garden work
- One check performed and the result
- Location sketch or photograph reference; next action
Use your browser’s Print command, or “Print guide” at the top, to print or save a PDF.
Check the original guidance
Sources & verification
Sources checked on . First published . Follow the manual for your exact model if its instructions differ.
- Husqvarna: No loop signal — LED-specific causes and checks
- Husqvarna: locating and repairing a wire break
- Husqvarna: charging station light is off
- Husqvarna: how ECO mode works
- Husqvarna: flashing green and manual signal reactivation
Diagrams and the order of checks are YardOnAuto’s explanatory presentation of the cited guidance, not manufacturer installation drawings.
Our editorial method